Introduction
This article provides a step-by-step guide on adding and configuring your Calzada e-mail account in the Android Email App.
Caution: This article was prepared using a generic version of Android 4.4 (KitKat) and the steps below apply equally to Smartphone or Tablet devices. As some Android devices have been "skinned" by
Method
1. Locate the Email App and then tap on its' icon to open.

2. If you have yet to define any email account, the Account Setup wizard will automatically appear - skip to step 3
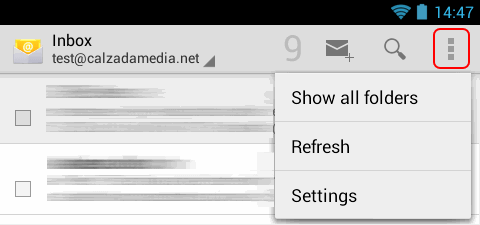
If you have already configured an email account, click on the menu icon (3 vertical squared boxes - see screenshot below) and the tap on Settings.
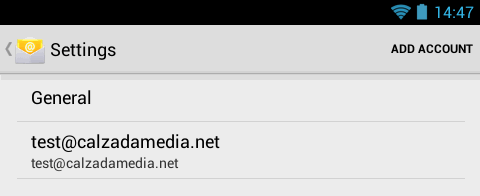
Then tap on Add Account (see screenshot below for reference).
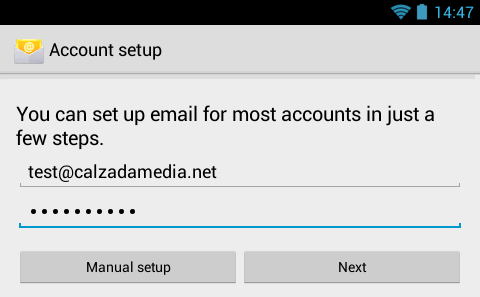
3. Where prompted, enter your email address and password and then tap on Next
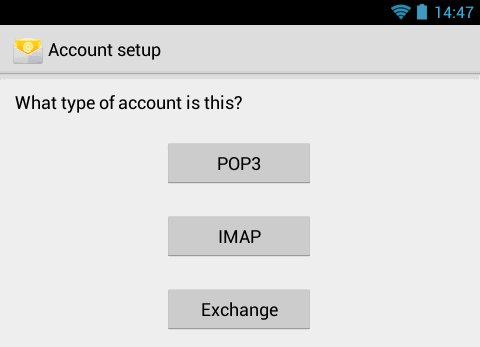
4. Tap on IMAP
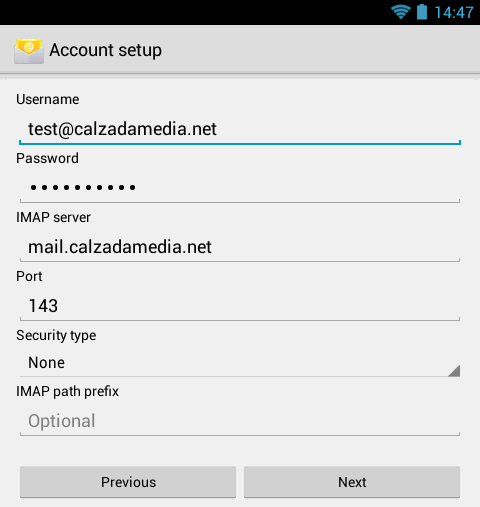
5. Configure IMAP settings as follows:
- Username = your email address (this should already be configured)
- Password = your password (this should already be configured)
- IMAP server = mail.
- For example, if your email address is joe@mydomain.com, the IMAP server will be mail.mydomain.com
- Port = 143
- Security type = None
- IMAP path prefix = leave empty
Once completed, tap on Next
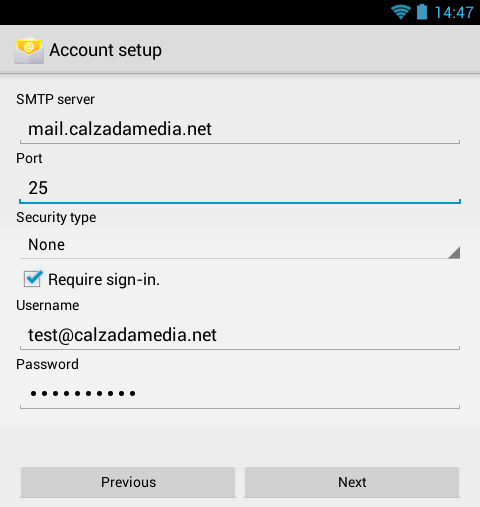
6. Configure SMTP settings as follows:
- SMTP server = mail.
- Port = 25
- Security type = None
- The option Require sign-in should be ticked/checked
- Username = your email address (this should already be configured)
- Password = your password (this should already be configured)
Once completed, tap on Next
7. The Account Settings page is where you may configure the various synchronisation options for the new account.
Alter if required and then tap on Next

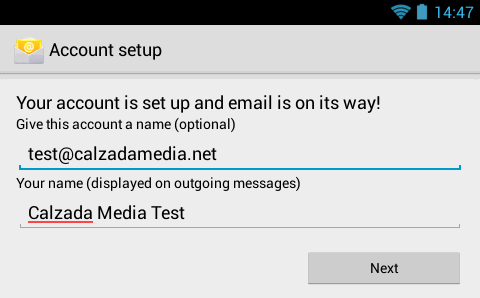
8. Finally, give the new account a name and specify a name to use in outgoing messages. The Account Setup wizard will have automatically configured values for both.
Alter if required and then tap on Next
9. The Email App will now begin to download and sync your IMAP account and you should see a list of your most recent messages after a few seconds.