Overview
This article provides a step-by-step guide on adding and configuring your Calzada e-mail account in Microsoft Outlook. The information below principally applies to Microsoft Outlook 2007, but it may be used as reference for later versions of Outlook.
Note: This article only applies to standard e-mail accounts, it does not apply to Hosted Microsoft Exchange. Details on how to configure Outlook for hosted Exchange may be found here.
Notes
For explanatory purposes, this guide will use the e-mail address of test@calzadamedia.net. Please replace this address with your e-mail address.
Guide
1. Within Outlook, go to Tools > Account Settings
Under the E-mail tab, click on New...

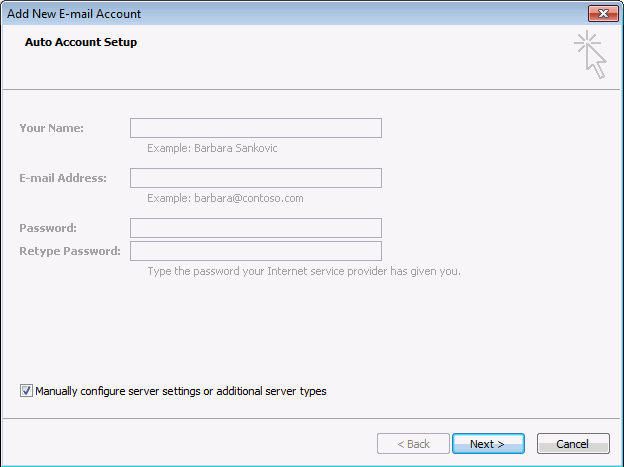
2. Don't enter any details into the textbox, simply check/tick the option Manually configure server settings or additional server types and then click on the Next button.
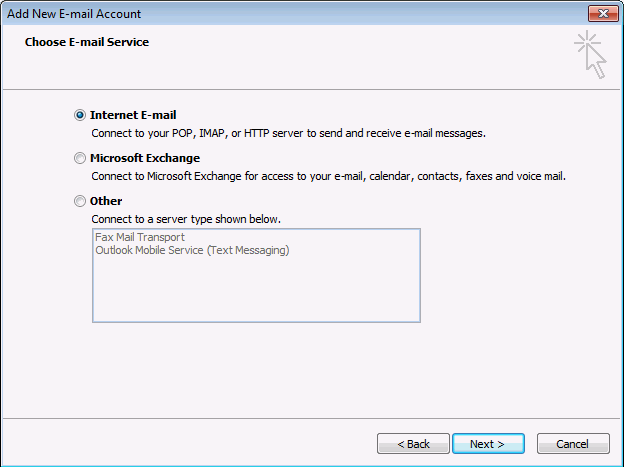
3. Select Internet E-mail and then click on the Next button.
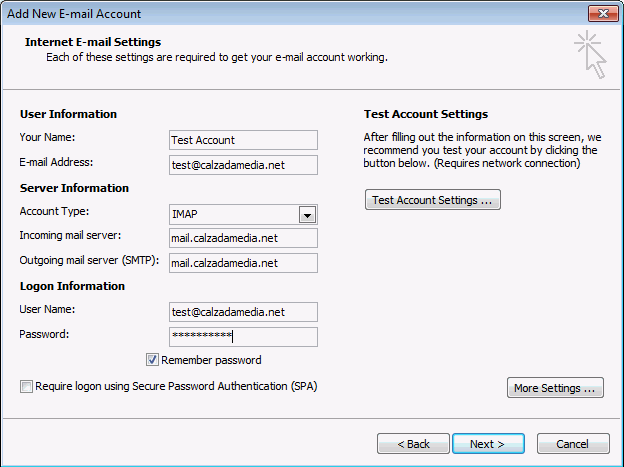
4. Fill out the textbox using your account details:
- Your Name: The name of the account e.g. Joe Blogs or Company Sales
- E-mail address: Your calzada e-mail address
- Account type: Select IMAP
- Incoming mail server: mail.calzadamedia.net
- Outgoing mail server (SMTP): mail.calzadamedia.net
- User name: Your calzada e-mail address
- Password: Your e-mail account password
Once entered, click on the More Settings ... button
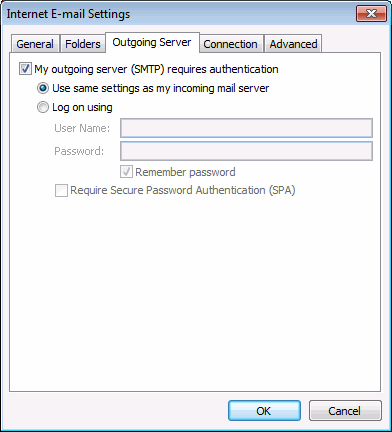
5. In the Internet E-mail Settings dialog, click on the Outgoing Server tab.
Check/tick the option My outgoing server (SMTP) requires authentication
Select the option Use same settings as my incoming mail server
Click on the OK button.
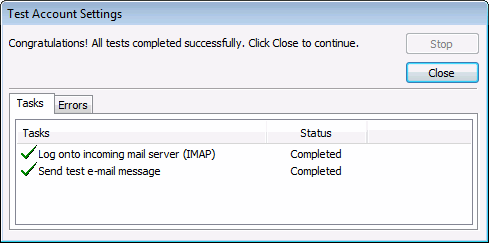
6. Back on the Add New E-mail Account dialog, click on the Test Account Settings button. If everything works, you will see a confirmation message. Click on the Close button.
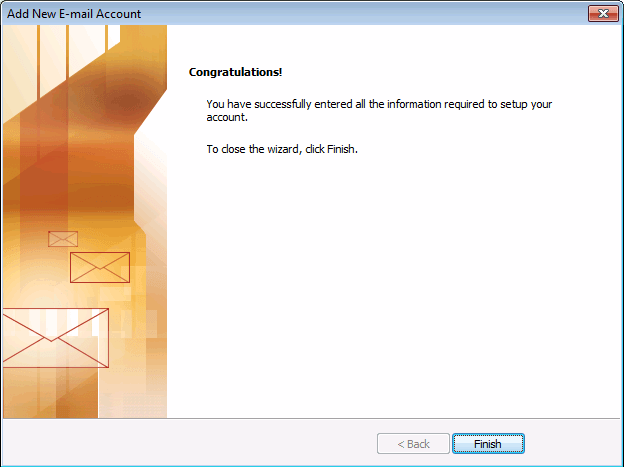
7. Back on the Add New E-mail Account dialog, click on the Next button. You will then see a congratulations message. Click on Finish to complete account setup.
8. You may be returned to the Account Settings window. Click on the Close button to return to Outlook's main window.
9. Outlook will begin synchronising your Calzada mail account.
Additional Information
Microsoft Outlook is typically updated through Microsoft Update. To protect against potential security issues, we recommend that Outlook is regularly updated.
Outlook is developed and produced by Microsoft. For help and assistance with Outlook, please refer to Microsoft Help & Support.